Ashley is an awkward potato in love with words, Kpop,…

“The best photos on Instagram use DSLR and serious Adobe Photoshop skills!”
A friend of mine said this line in disdain one Sunday morning. She was lamenting over the fact that her IG photos didn’t get as much likes. In her opinion, her iPhone skills are not enough to deliver quality pictures.
Bless her soul, but I beg to differ.

Fancy cameras and advanced photoshopping are no longer the only means of taking amazing IG-feed worthy photos. I talked to Tricia Salalima (@triciasalalima), a wedding photographer/editor of Chapter One Studios, and asked her how you can bring your photos to life without spending too much money or memory.
It’s the Thought that Counts
Tricia has been working as a photographer and creative producer for Chapter One Studios for two years already. The countless weddings and special events she had to cover have taught her a thing or two about taking good pictures — even for Instagram.

Her definition of IG-worthy photos is simple: “It should make sense.”
According to her, the best pictures strike a perfect balance between the subject and the scenery. She doesn’t deny that this balance is easier to see with a DSLR. The camera’s advance setting enables photographers to shift focus and still tell a story. With a phone, what you see is what you get.
But this shouldn’t dishearten you, my fellow IG lovers. Phone or camera, it doesn’t matter.
What matters is the content of your photo.
“Instagram photos that are well-thought of are usually the best ones,” said Tricia, “You have to think about the story first before you worry about the technicalities (e.g., lighting, angling, and framing). Your content will reveal the subject of your photo. That way, it won’t be a mess.”
So that’s your first step: think of the story. Once you’ve nailed the content down, you can move on to the technical stuff.
Phone Pics 101: Lighting & Framing
An IG-worthy photo is the perfect combination of two elements: framing and lighting.
Lighting
A Grand Canyon Indeed
As much as possible, go for natural light. Tricia considers this type of lighting as the best one for both Android phones and iPhones. But did you know that there’s a certain type of light you should chase after?
The Golden Hour (4 PM until the sun sets) is the best time to take photos.
The sun’s light during noon is too harsh, says Tricia. According to her, photos taken during 12 NN to 3 PM end up looking too sharp while those taken during the Golden Hour look softer and more natural. They also offer more dynamics and are more pleasing to the eyes.
But what if you just have to take a photo before the Golden Hour?
Indoor lighting is always best during 12 to 3. Feel free to snap as many photos as you like; just make sure you’re not taking it against the light.
Framing
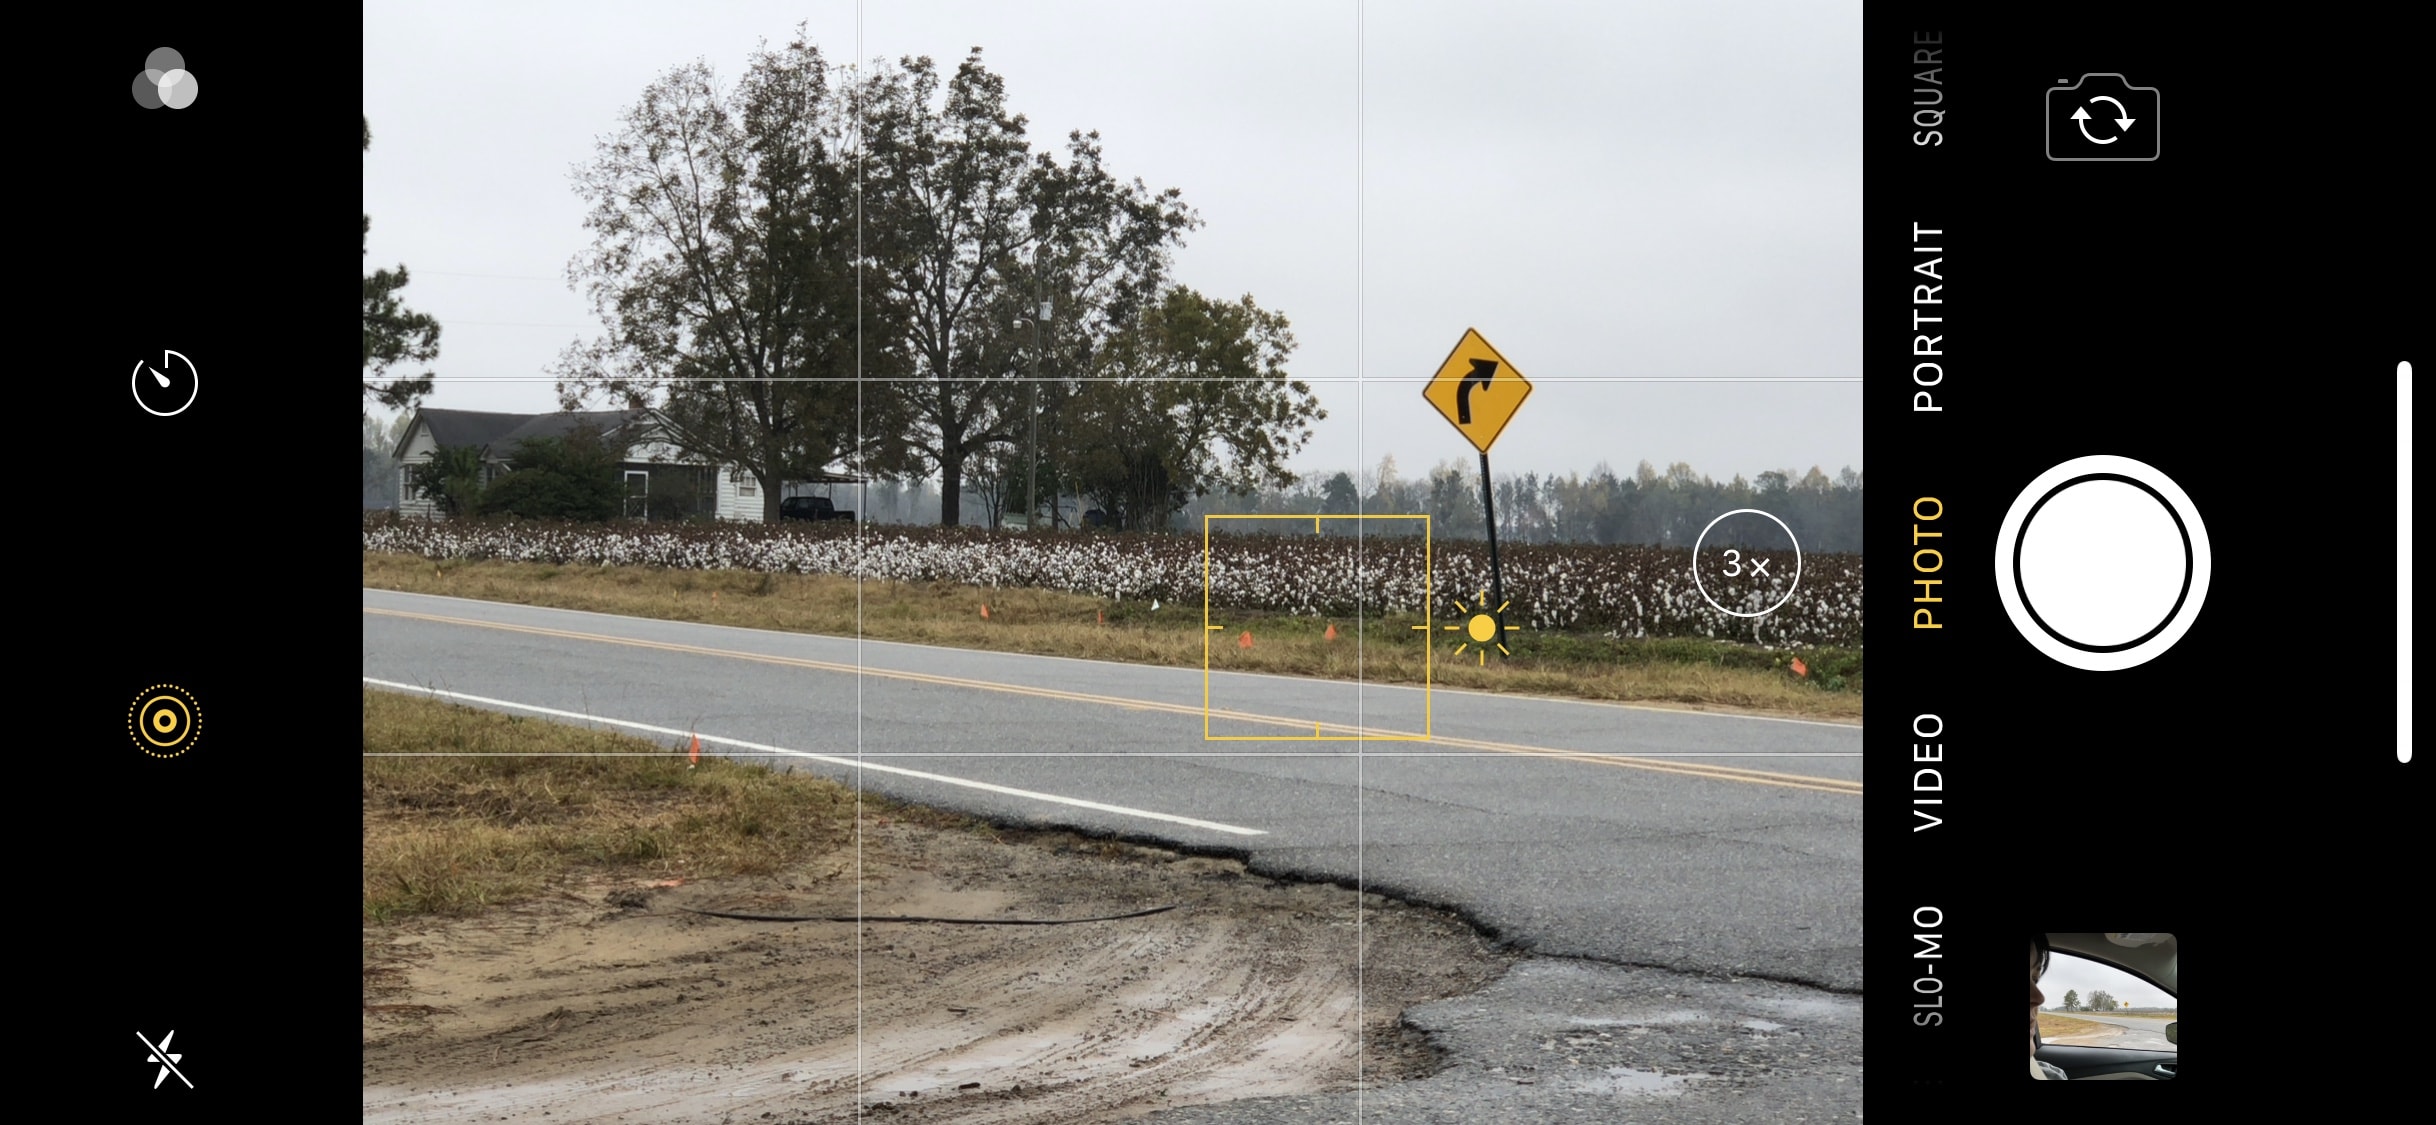
Proper photo framing requires practicing the Rule of Thirds — a guideline that proposes imagining all images divided into nine equal parts by two equally spaced vertical lines and two equally spaced horizontal lines.
Basically, it’s the grid your eyes naturally look for when you’re staring at a view from your phone’s camera. If you have an iPhone, it’s that grid that appears on the screen when you’re trying to take a photo.

This rule keeps you from taking off-grid photos. According to Tricia, images outside of the grid don’t look pleasing to the eyes. Take better IG pictures by making sure the subject of your photo is ALWAYS at the center of the grid. Whatever sits at the center is the focal point of the photo.
The Different Ways to Take Different Photos
Tricia believes there’s no one way to take IG-worthy pictures. You’re free to snap as you please. If you want consistency (which is important if you want an aesthetically-pleasing Instagram feed), however, she offers advice for the following types of Instagram shots:
Food
“Don’t settle for the typical flatlays where you just stand up and take a photo landscape style,” said the Chapter One photographer, “Experiment with colors and angles.”
Take this photo for example:

The bland photo fails to make up for the tocilog’s deliciousness. Yes, it’s sort of flat lay but it looks boring. To add insult to injury, there’s a hand near the soup. There is no substance to this photo.
Tricia re-dos the photo and ends up with this:

Here are a couple more samples of food shots:


Objects
Again, framing and position make a big difference. Say you want to show off your new shoes and use the greenery for the background. Some people end up taking photos like this one:

Sure, the red goes well against the green, and the flower adds a bit of interest, but the focus of your photo is unclear. What is the main point of the image? Your shoes or the flower?
Instead of confusing followers, apply the Rule of Thirds and place your shoes in the center of the photo like this:

How about a flower shot?

OOTD (Outfit of the Day)
So you wanna show off your clothes for the day? There’s a symmetrical background nearby and you have a friend who can take photos.
Is this the right way to do OOTD?

Unless you like to endorse a fan-unit while you’re at it, why not?
Experimenting with angles and posing (yes, like Asia’s Next Top Model) can add extra vamp to your photos. In this case, the background offers promising shapes and lines. Take advantage of it by taking your photo from a different angle. Also, pose the best pose while you’re at it.

Another sample for OOTD shot:

Turista Shot
When you’re out-of-town or the country, a good photo of the scenery is ALWAYS a must-have. In a society where a Pics or It Didn’t Happen concept exists, an amazing picture from your recent trip is enough to blow your followers away.
But how do you keep your out-of-town photos from looking “too turista?”
Take this photo for example:

What’s wrong with it?
“It looks too tourist-y. The main subject (me) is not in the center of the grid. People who look at your photo will be torn. Who do they look at? You or the background?” asked Tricia. Plus, the photo looks a little lopsided, which fails to display the view’s (or your) beauty.
Here’s how we fixed the shot:

It achieves two goals: the tourist is the center of attraction. There is symmetry that is pleasing to the eyes.
Let’s see more good turista shots:


Editing Apps Help, Too
Who says Adobe Photoshop or Lightroom are the only apps you can use to edit your photos? Tricia recommends downloading the following apps:
- VSCO. This mini Lightroom version offers natural-looking filters that don’t look too intimidating.
- Filmborn (only available for iOS). If you like ancient/film feels for your photo, this app is for you.
- Snapseed. The app is perfect for the OC IG-er. It has all the tools you need to edit the saturation, erase unwanted objects, and fix the lighting curve.
You don’t need a DSLR or advanced photoshop skills to achieve an artistic level of arte for your IG-feed. For Tricia, your phone can do the magic for you. Focusing on lighting, proper grids, and angles can turn your meh pics into masterful IG posts.
Now, go forth and multiply — your IG followers.
What's Your Reaction?
Ashley is an awkward potato in love with words, Kpop, and corgis. She spends her free time dancing like one of those balloon things you see in malls.


