Web content writer. Mother to a cat named Fatty and…

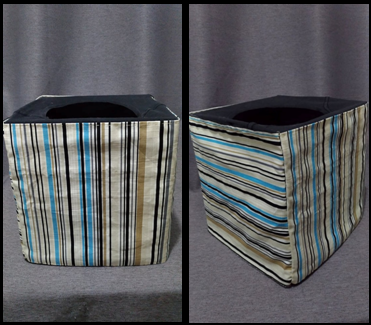
I like my DIY’s cheap and easy. So I was super happy to find DIY cat house instructions that let you make a cat house in only five minutes. But since I want my baby’s box to a bit more maarte (since my baby is a little prince after all) I added an extra fabric to make it look prettier. Here’s my version of the DIY t-shirt cat box.

What you’ll need:
- An old box
- An old shirt
- A sewing kit
- Strips of fabric
- Fabric glue (optional)

NOTES:
- You can use a cardboard box or any other sturdy box. I’m using this old storage box my cat Fatty murdered as he deemed it fit to make it a scratching post.
- Make sure the shirt you use doesn’t tear easily and isn’t too stretchable. I used this stretchy cotton shirt and the opening became too big and it easily tears with Fatty’s nails.
- You don’t need to buy new fabric. I had scraps of fabric lying around from my previous DIY project. It’s actually cuter if you have different cloths ‘cause you can make it look like a quilt.
- The fabric glue is optional but I recommend gluing the shirt to the box after you’ve sown the shirt and fabric together. This will keep the shirt in place in case your cat decides to make the box his scratching post.
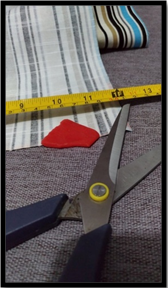
 STEP 1: Cut the fabric.
Measure the box to determine how much fabric you need. After marking your fabric with your box’s dimensions, cut the fabric an inch away from the markings to give allowance for seams and hems.
STEP 2. Make simple hems.
Fold in your raw edge about ¼” then fold it again about ¾”. Most people press the folds with a flat iron, especially if they’re going to use a sewing machine, but since my cat house is hand-sewn I just used pins to keep the fold in place and sew the fabric. Do this for all sides. (A simple running stitch is fine. Don’tworry about making ugly stitches your cat won’t judge you.)
 STEP 3. Wrap the shirt on the box.
Place the neckline on the box’s opening and try to make the shirt as tight as possible. Tuck in the sleeves and fasten the shirt with safety pins.
STEP 4. Sew the fabric on the shirt.
Now, this is the tricky part. Pin the fabric to the shirt. Use as many pins as you can to make sure that you sew the fabric on the right side of the shirt. Remove the pins that fasten the shirt to the box so you can secure the fabric properly on the shirt. Take your time with sewing to avoid pricking yourself with the pins.
STEP 5. Fasten the shirt to the box.
Tighten the fit of the shirt over the box again and sew the cloth by the box’s base. To further tighten the fit of the shirt over the box, you can use fabric glue.
And just like that your cat now has an adorable house. Here’s my little prince exploring his new little home.

Hope you enjoy making yours! And do let us know how yours turn out.
What's Your Reaction?
Web content writer. Mother to a cat named Fatty and a basil named Herby. Dreams of going off the grid and running an animal shelter with her wife.


 STEP 1: Cut the fabric.
 STEP 3. Wrap the shirt on the box.